Create Automated Rules for Facebook Ads: A Step-by-step Quickstart Guide
May 3, 2023
With this step-by-step instruction, you'll learn how to create a new automated rule from scratch.
AutomatedRules is a tool for automatically keeping your ad performance under control 24/7 and optimizing it by adjusting your campaign settings based on selected metrics.
Our ad management automation rules can help you pause unprofitable ads, scale top-performers, and a lot more. In short, they can help you manage your ads more efficiently by delegating time-consuming and repetitive tasks to automation.
In this quickstart guide, we’ll go through the basic steps of setting up automated rules. We’ll use Facebook as an example, but the same instructions are applicable for all other platforms supported by AutomatedRules: Facebook Ads, LinkedIn Ads, Google Ads, TikTok Ads, Snapchat Ads, and Twitter Ads. There’re slight differences in the range of actions and metrics available that are connected with ad platform specifics but, in general, the setting up process will be similar for all.
In the first part of our guide, we’ll integrate our Ad Account on AutomatedRules. If you have already finished this step, feel free to skip this part.
1. Integrate your Ad Account
Before we start automating our ads, we need to connect our Ad Account in the Integrations section in the left sidebar menu. After clicking Add Ad Account in the Facebook section, we need to grant the permissions required for the rules to work. Once we give them, we’ll just tick the boxes to the left of accounts we plan to use and click Add Ad Account again.

Now let’s move on to the next step and start creating the rules for our Ad Account.
2. Create your first automated rule
Automated rules are based on conditions or “if-then” statements: a certain action will be performed on our ads only if specific predefined conditions are met. It may sound a bit difficult, but in a moment we’ll see how easy it actually is.
First, let’s take a look at the basic elements that automated rules consist of:
- Scope, or what the rule will be applied to – for Facebook ads these are ad, ad set, or campaign level;
- Task, or the action that will be performed if the conditions are met;
- Task frequency, or how often the action will be performed;
- Conditions, or the triggers that will activate our rule;
- Schedule, or how often rule conditions will be checked.
Now it’s time to create our first rule. In this guide, we’ll create a rule for pausing Facebook ads when they show low performance: this will help us avoid wasting our budget.
To see how to create other types of rules, check out our video guides.
Let’s imagine that our company decided to launch an ad campaign to get more sales, and this campaign has 3 ad sets with 3-5 ads per ad set. We’ll consider this campaign profitable if it has a ROAS of more than 1 and more than 5 purchases.
To set up our rule, we need to open the Automated Rules section in the left sidebar and click Create Rule.

For now, we’re going to create our rule from scratch. Keep in mind, though, that you can also use strategies – the templates with a combination of rules tailored to specific cases.

To make sure that we can quickly find this rule later, we give it a distinct name – Pause ad sets with ROAS < 1 and Purchases > 5.
Now we choose what our rule will be applied to, or its scope. First, we select the right Ad Account, click Apply to, then choose a specific level in campaign structure that our rule will be applied to.

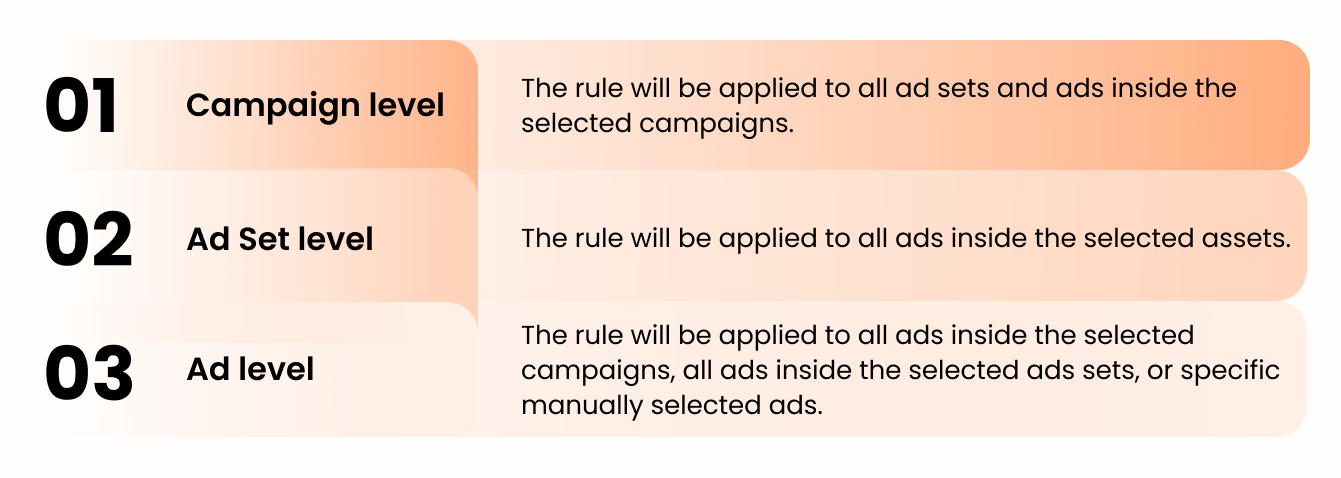
When it comes to Facebook ads, there are 3 such levels: the Campaign, the Ad Set, and the Ad level. In general, the lower a level is in the hierarchy, the more customizable your rules will be. For example, if you choose the Ad level, you’ll be able to select specific ads the rule will be applied to. If you choose the Ad set level, the rule will be applied to all of its ads without exception.
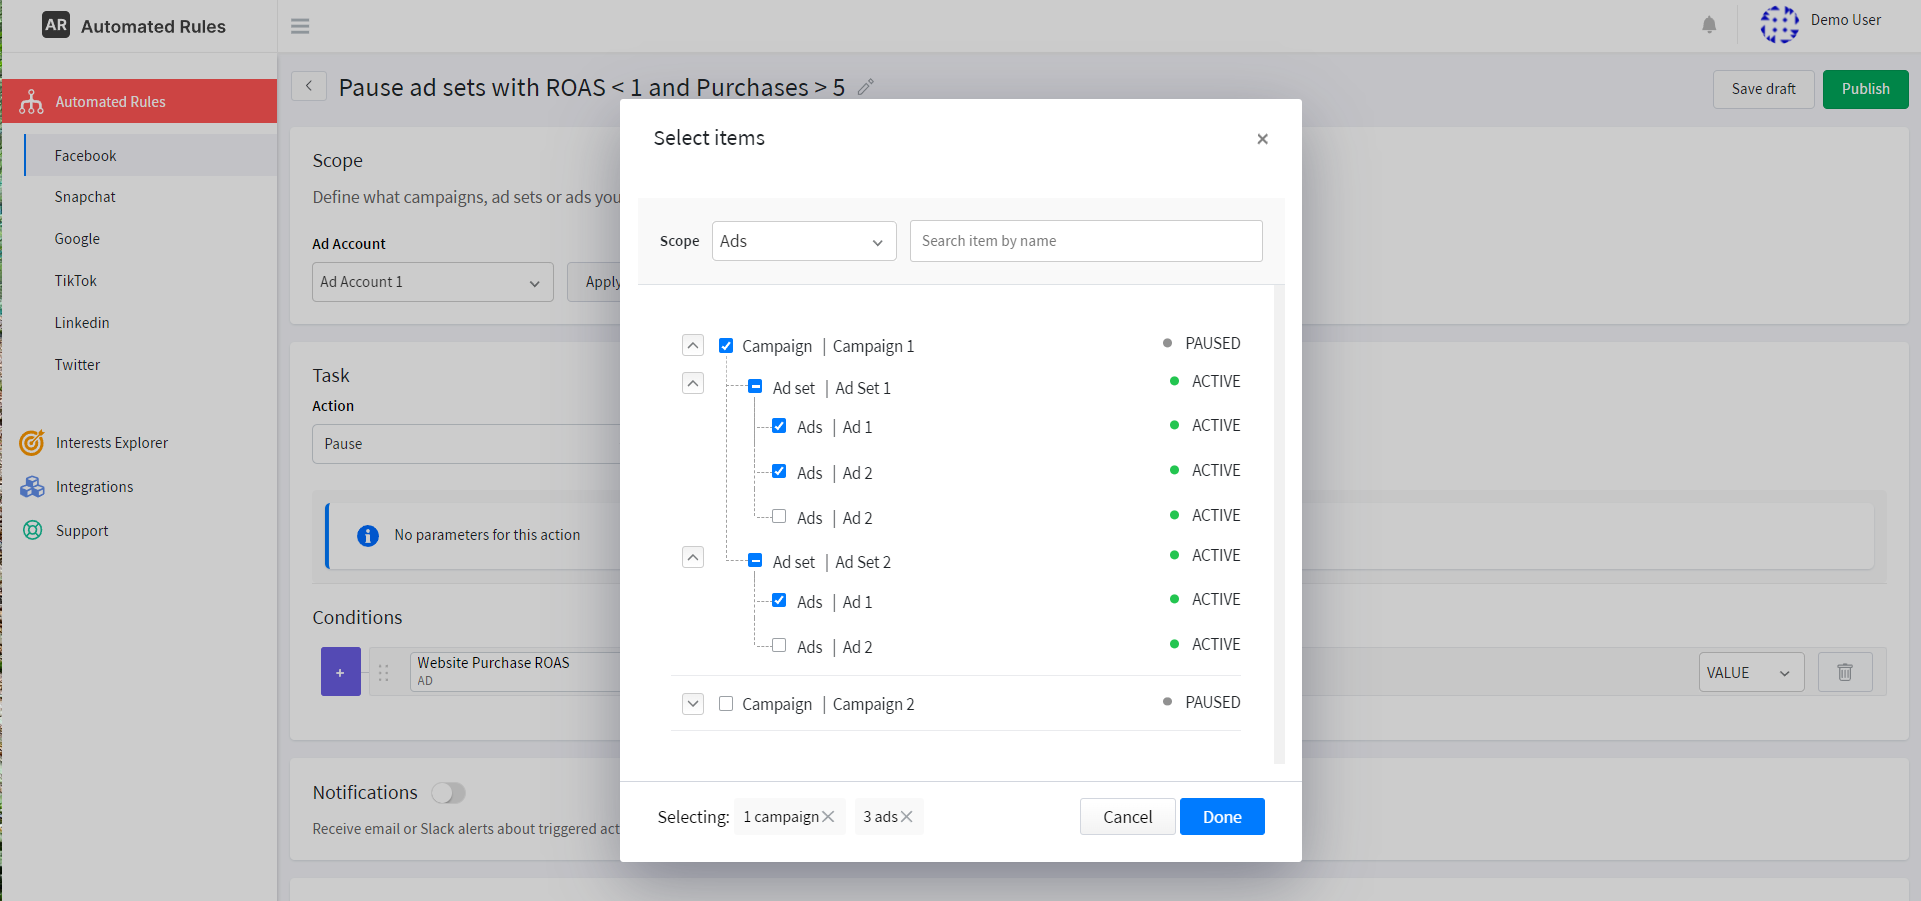
If we want to apply our rule only to specific ads, we’ll need to select Ads as the scope, click on the dropdown arrow next to certain campaigns and ad sets, and then tick the boxes next to those ads.
Next, we’re going to proceed to the Task section to choose the action of our rule, or what will happen to our ads under specific conditions. Note that the list of available actions slightly differs depending on the item level we chose previously. For this rule, we select Pause as the action to turn off underperforming ads.
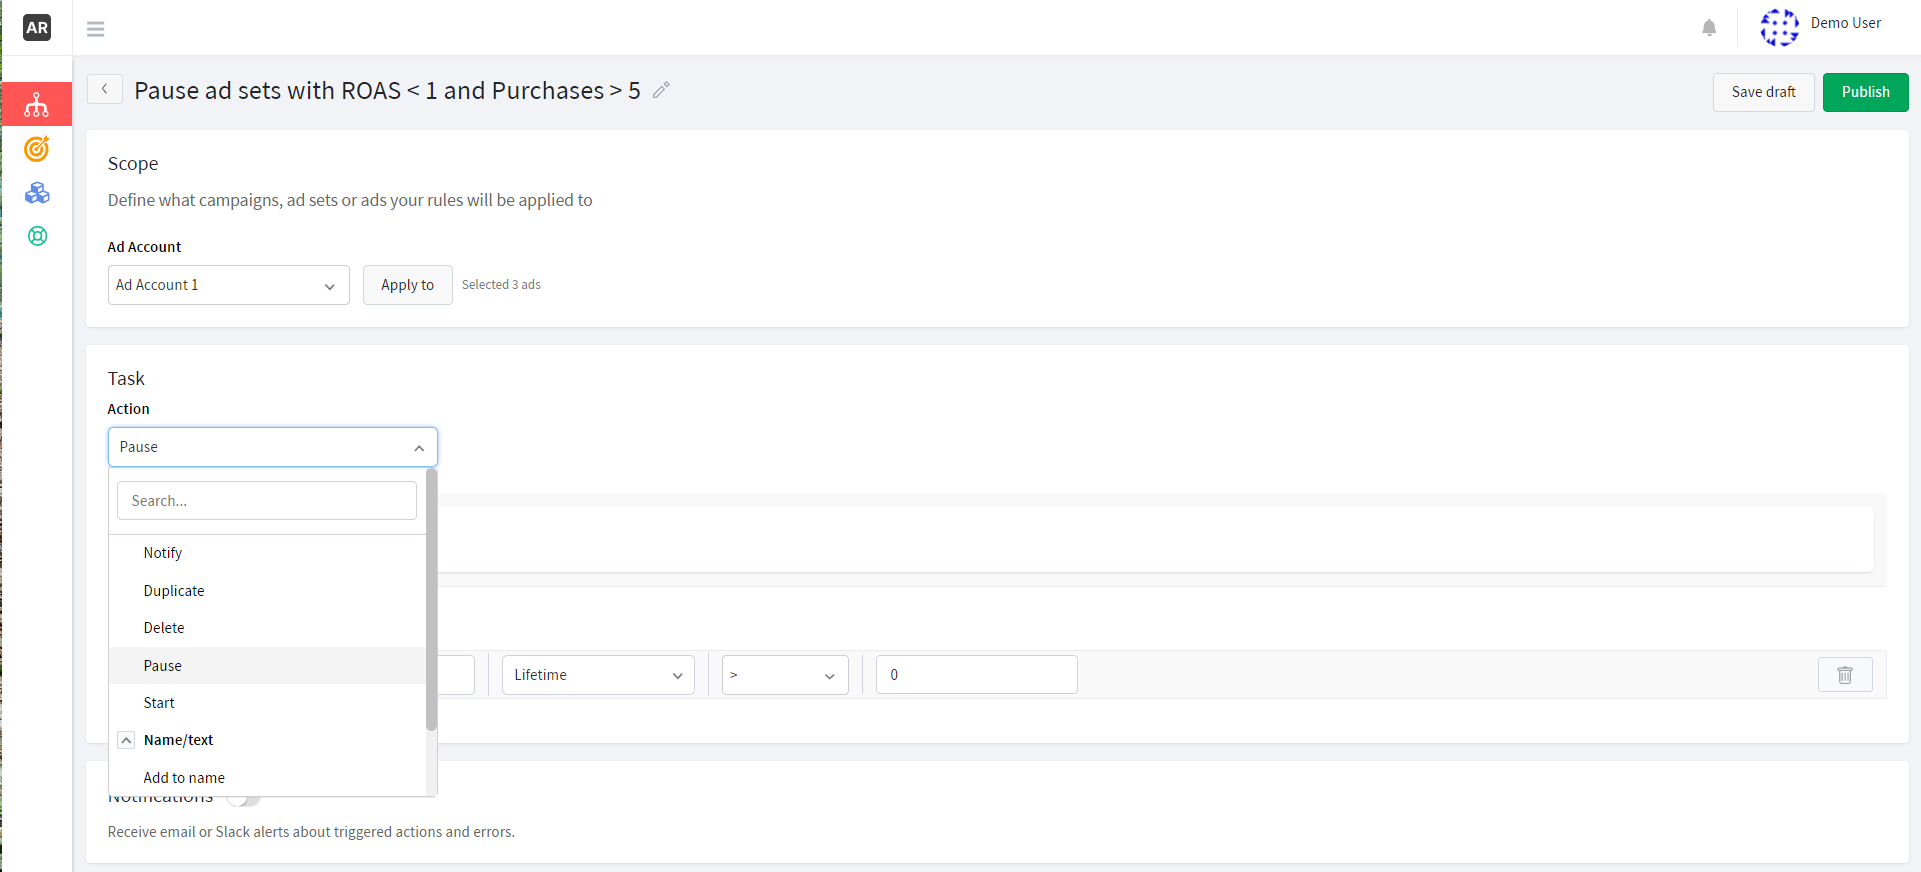
Now, it’s time to define the conditions that will trigger our rule.
Each condition consists of 3 parameters:
- Metric, or rule trigger;
- Time frame, or the time period for which our metric will be checked;
- Metric value or its ranking among the top or bottom performers of same-level items.
Let’s go through each parameter of our rule.
First of all, we need to choose the metric that will indicate whether an ad is profitable or not and trigger our rule. As we’re running a campaign aimed at generating sales and we care about our ROAS, we choose Website Purchase ROAS as our metric.
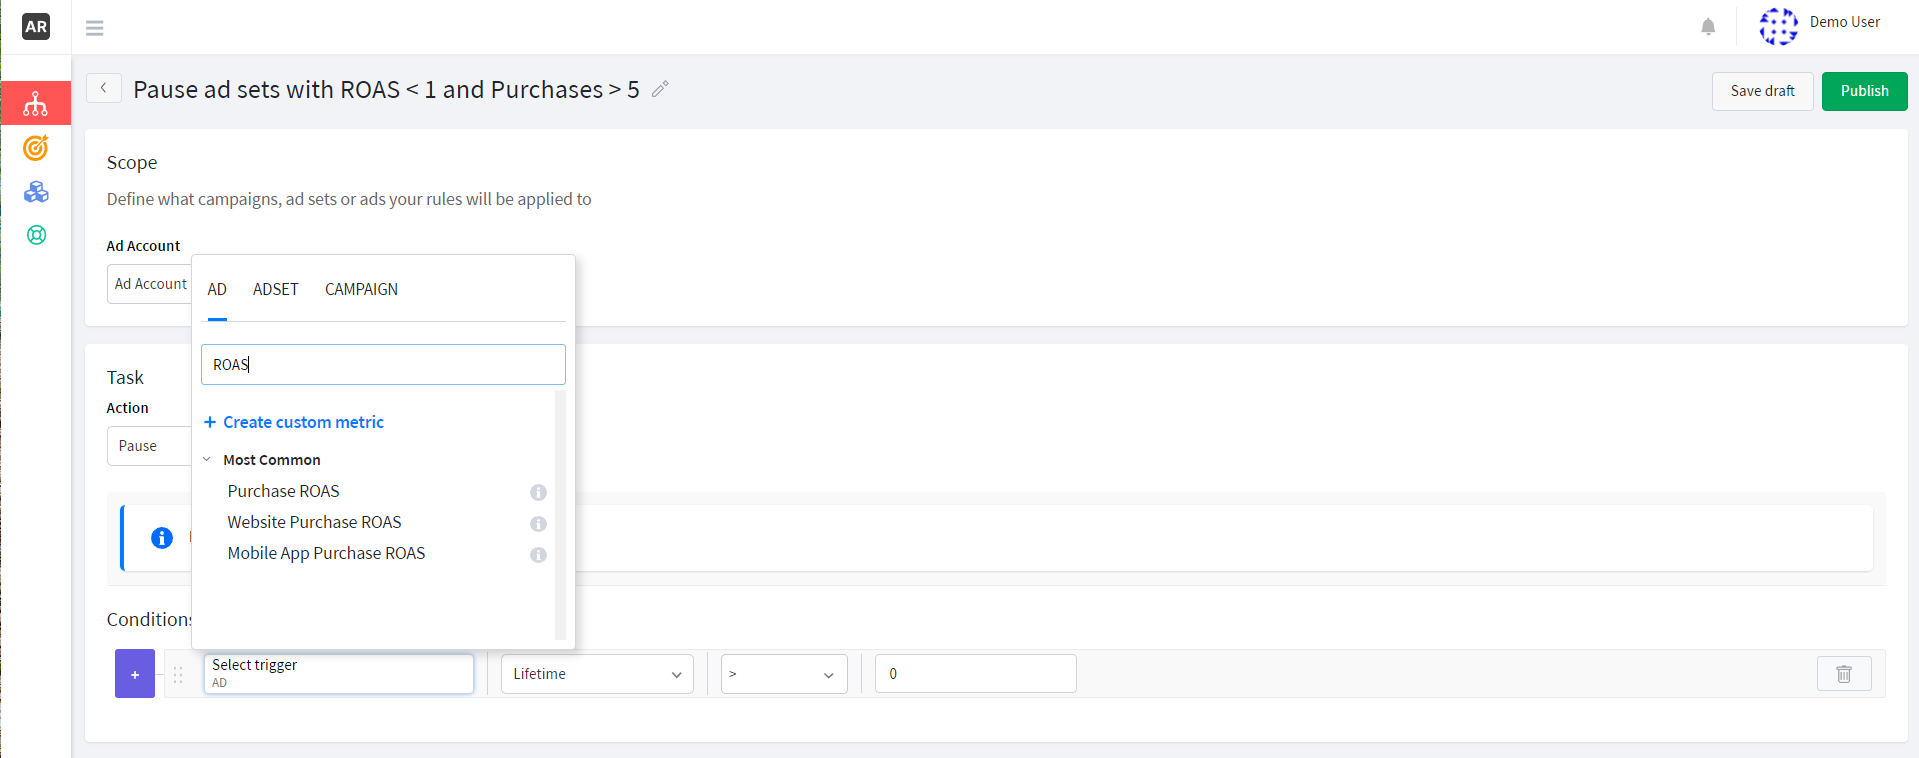
Now, we need to select the time frame, or the time period when our metric will be checked. The customer’s journey from seeing an ad to making a purchase will take some time, so we’re going to choose the last 7 days including today as a time frame for measuring ROAS and Purchases.
Lastly, we set the value of our metric. We have previously established that we’ll consider our ads to be profitable if they have a ROAS of 1 and higher, which means that they should at least bring as much revenue as the amount of money we have spent on them. Therefore, we’ll want to pause our ads if their ROAS is less than 1 – this will be the value of our metric.
So far we have set the main condition of our rule. However, it’s important to keep in mind that just a single condition might not be enough to make a reasonable decision. That is why we would recommend adding another condition to avoid accidentally pausing ads too soon.
In our case, we want to make sure that an ad has generated at least some Purchases before we pause it for having a low ROAS, so that’s what we’ll set another condition for.
We can create a new condition or a group of conditions by clicking the “+” button. When we do that, we also need to decide what type of connection our conditions will have with each other.

There are 2 types of relations between conditions: AND and OR.
- AND implies that all conditions must be met in order for the rule to be triggered;
- OR indicates that it will be enough if just one condition is met for the rule action to be performed.
For our rule, we’ll select the AND operator to ensure that our ads will be stopped only if both conditions are met.
As the metric for our second condition, we select Website Purchases and set it to be more than 5 for the last 7 days including today.
That’s how the Task section will look for our rule:

Now, we choose whether we want to receive notifications each time our rule gets triggered and how exactly we want to be notified.
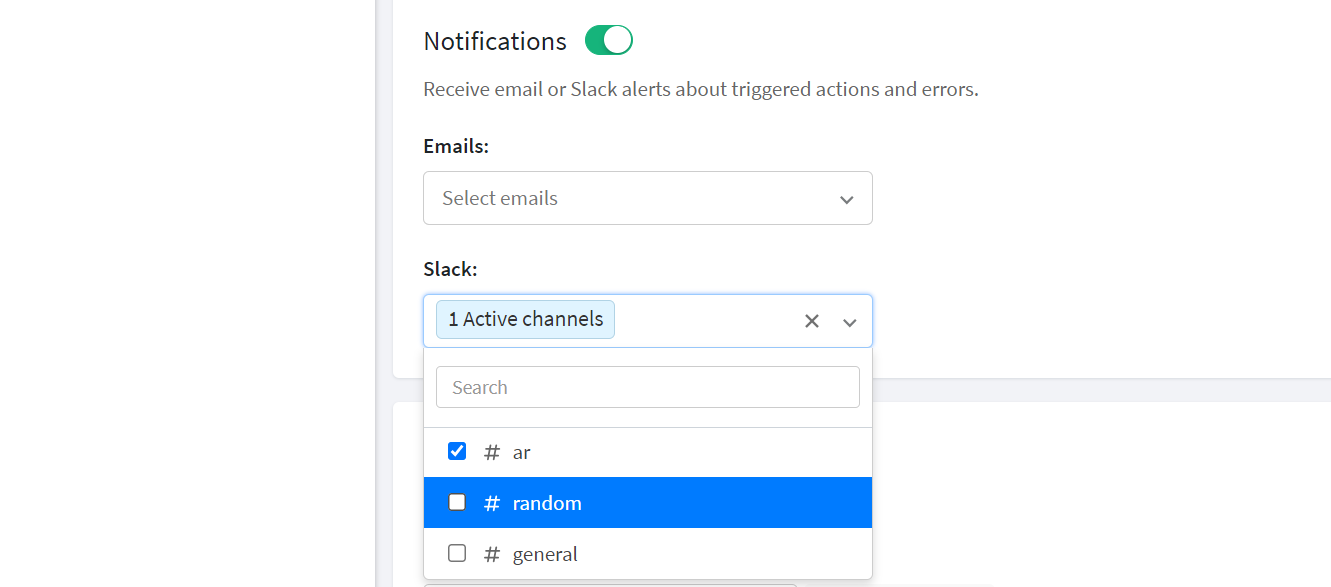
Finally, we can move on to the Schedule section to set the Rule checking frequency, i.e. how often the conditions of our rule will be checked. We can select one of the standard options from the dropdown or choose a custom frequency. Let’s set the frequency to once a day at 12 a.m. every day of the week.
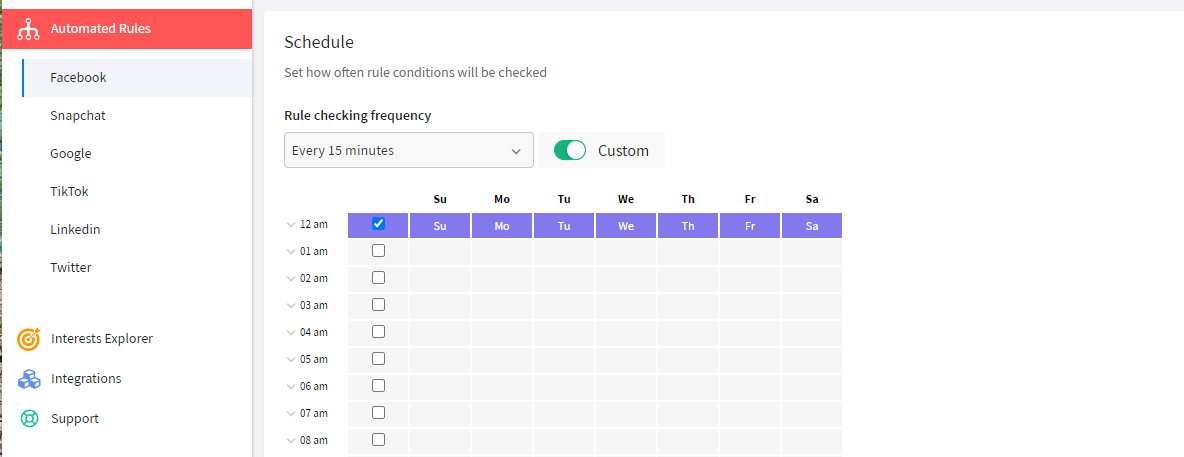
Once we’re done, we can click Publish at the top of the page, select the folder where we want to save our rule, then click Save. Now our rule will start running and will pause our ads when their ROAS is too low.
To check all rules that we have created, we can go to the Automated Rules section in the left sidebar menu and choose a specific platform to see the full list.

We can perform different actions to our rules, such as:
- Edit rules to change specific parameters. After the changes are made, the rule will be running according to new parameters.
Note: If the action has the frequency “Once in a lifetime” and it has already been triggered once, the changes won’t be applied – you’ll need to create a new rule from scratch or duplicate this rule and change necessary parameters. - Watch their logs to see what changes have been applied to the selected items and when;
- Duplicate them to create new rules on the basis of existing ones and adjust specific parameters;
- Delete them permanently.
So far, we have learned how to create a rule for pausing ads that don’t perform well. We might need this rule to control our budget spending better and avoid wasting money on unsuccessful ads.
Tip: check out our video guides to see how to create other types of rules.
Now you can start automating your ads with AutomatedRules today.
Need some help or have questions? Book a demo with our Customer Success team or contact us to start your marketing automation journey.
